We remain fully operational. Our teams are working around the clock to ensure your deliveries continue safely.

قم بتنزيل التطبيق


معلومات عنا
حقوق الطبع والنشر © 2024 Desertcart Holdings Limited
قم بتنزيل التطبيق


Buy anything from 5,000+ international stores. One checkout price. No surprise fees. Join 2M+ shoppers on Desertcart.
Desertcart purchases this item on your behalf and handles shipping, customs, and support to QATAR.
🚲 Elevate your ride, elevate your space — don’t let clutter hold you down!
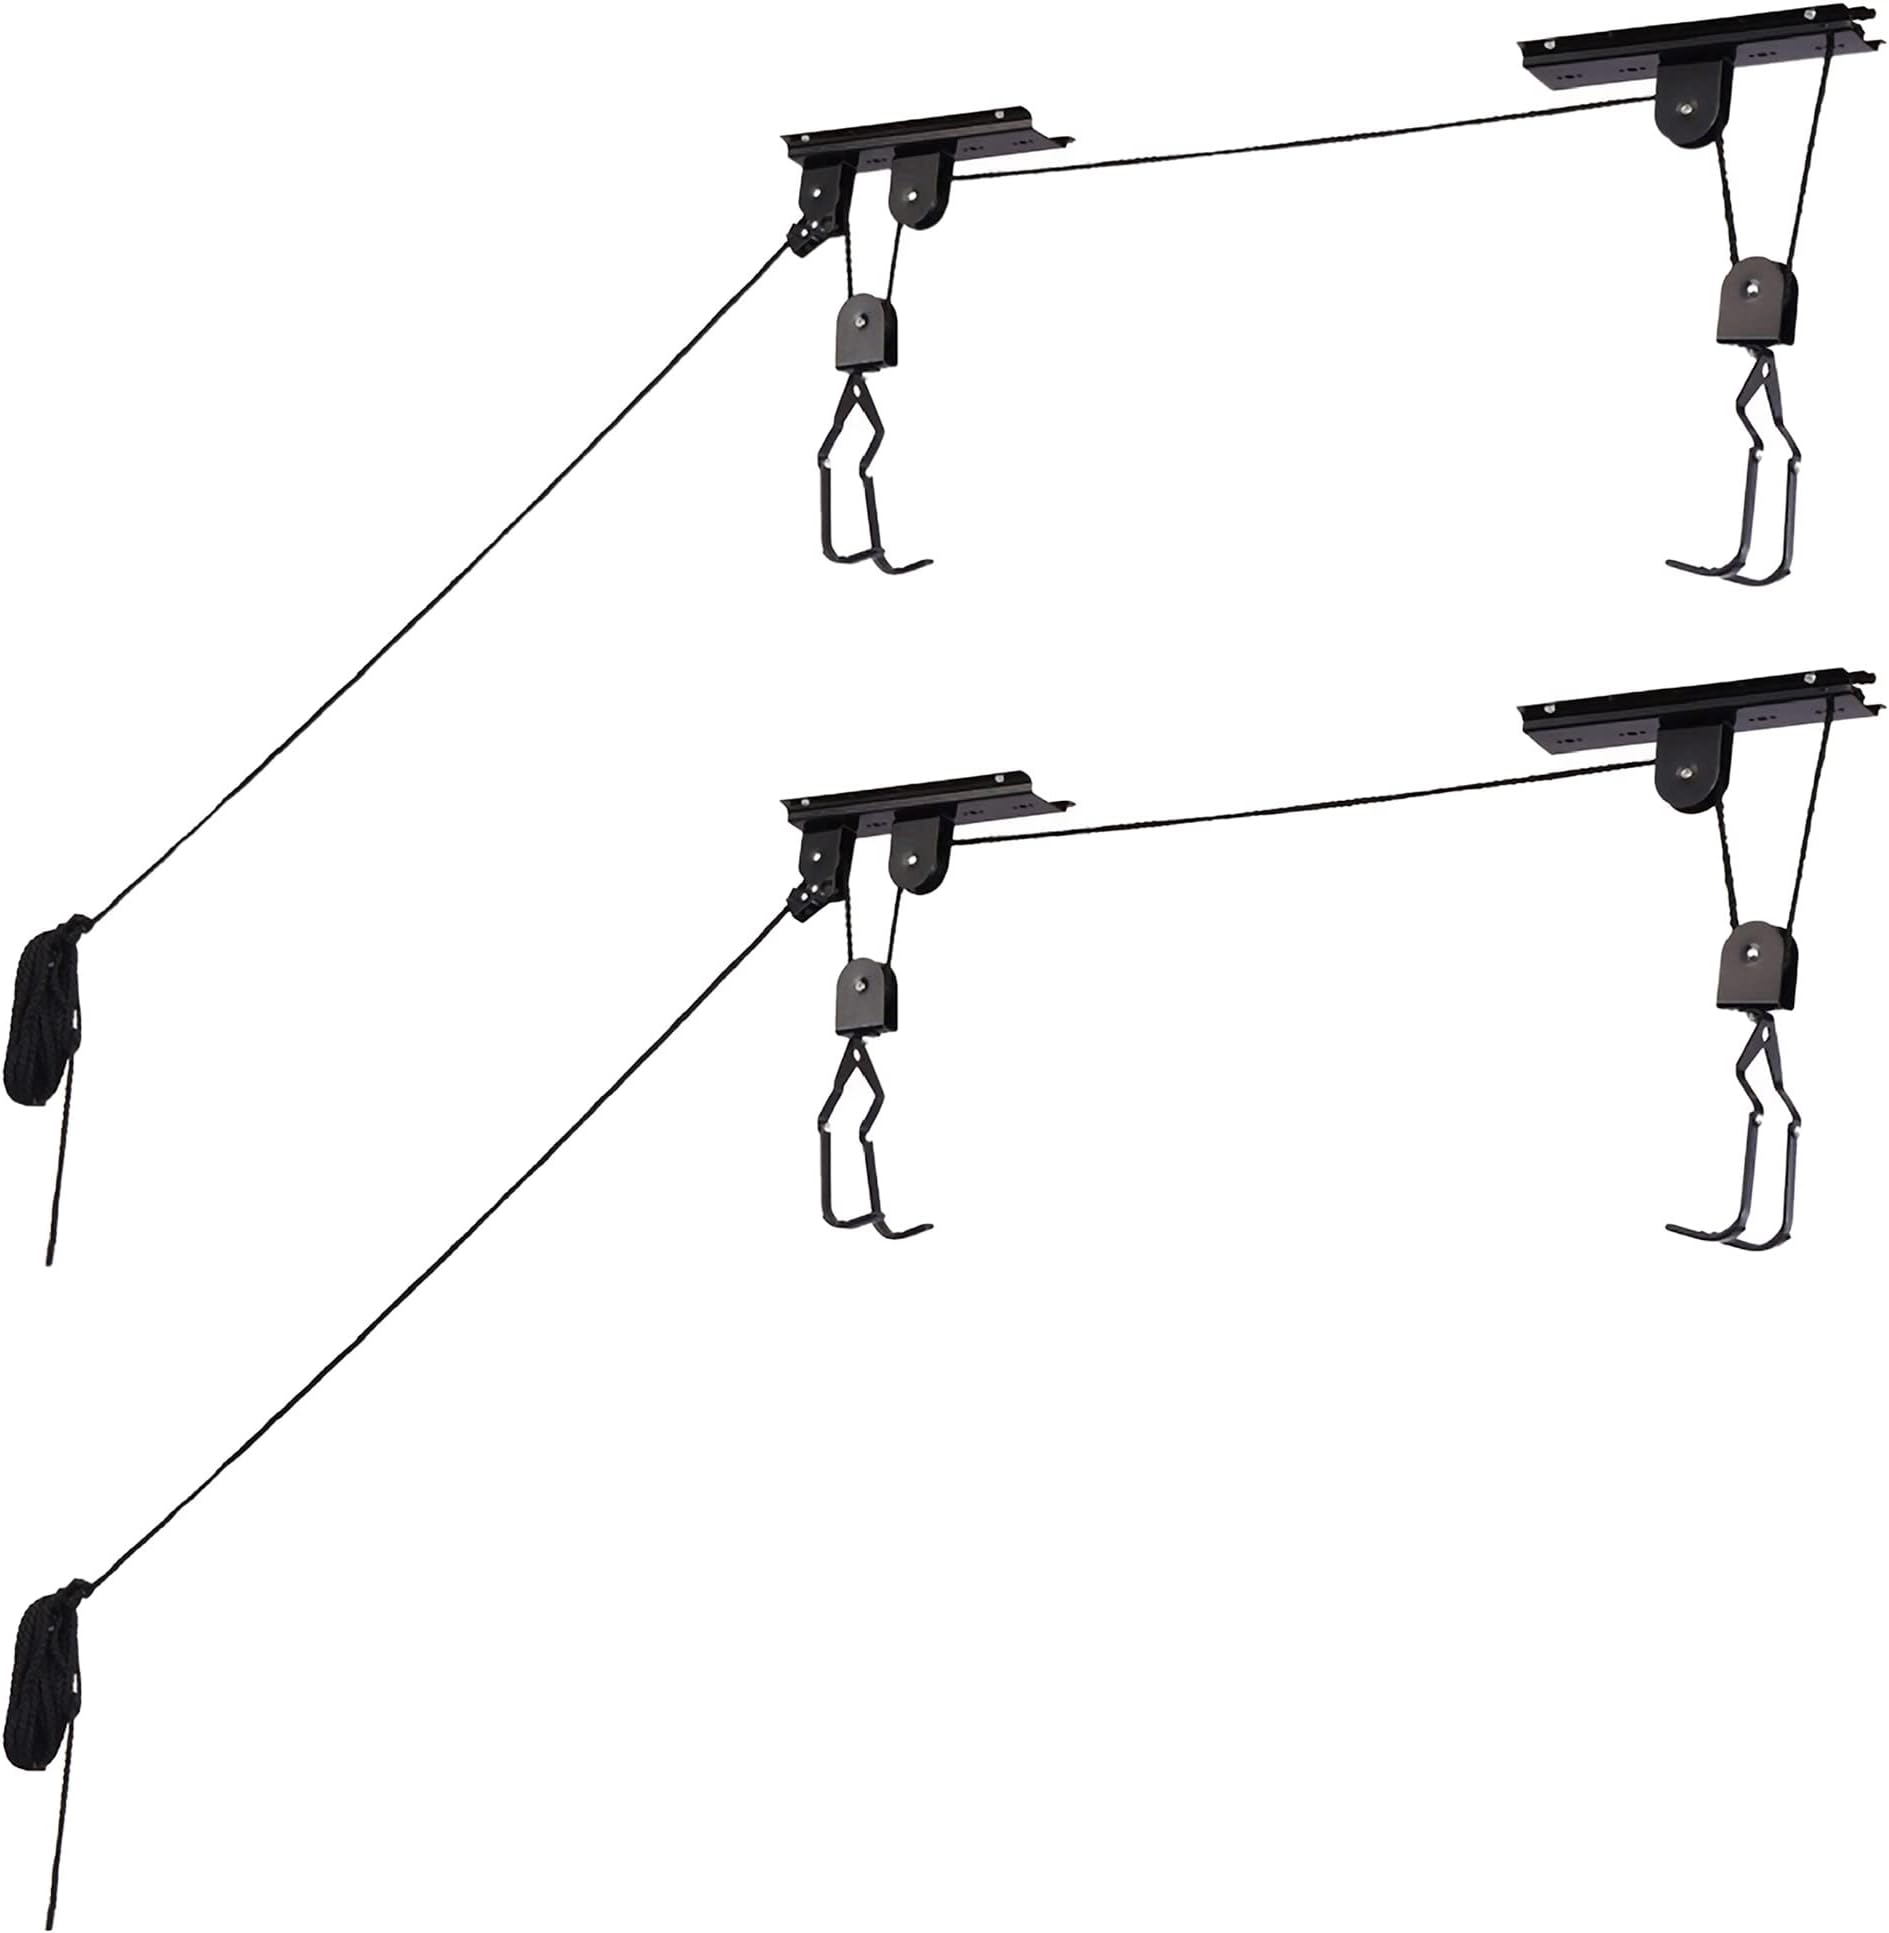
The RAD Sportz Bike Hanger is a premium overhead pulley system designed for secure ceiling storage of bicycles or ladders. Featuring a 100lb load capacity, rubber-coated hooks to prevent scratches, and a safety locking mechanism, it maximizes garage space with easy installation on ceilings up to 12 feet high. Trusted by thousands, it’s the original heavy-duty hoist that combines durability, convenience, and protection for your gear.


| ASIN | B003TFOPJA |
| Additional Features | Easy Lift and Secure Locking Mechanism |
| Best Sellers Rank | #5,394 in Tools & Home Improvement ( See Top 100 in Tools & Home Improvement ) #2 in Bike Racks & Stands |
| Brand Name | RAD Cycle Products |
| Color | Black |
| Customer Reviews | 4.3 4.3 out of 5 stars (13,951) |
| Global Trade Identification Number | 00885333131429 |
| Included Components | Hoists |
| Indoor Outdoor Usage | Indoor |
| Item Type Name | Bike Hoists – Overhead Pulley System with 100 lb Capacity for Bicycles or Ladders – Secure Garage Ceiling Storage by Rad Cycle (Set of 2) |
| Item Weight | 1.82 Kilograms |
| Manufacturer | Trademark GLB |
| Manufacturer Part Number | 2004 RAD Bike Hoist 2 Pack |
| Material Type | Metallic-Fiber |
| Model Number | 2004 RAD Bike Hoist 2 Pack |
| Mounting Type | Ceiling Mount |
| Number of Shelves | 2 |
| Recommended Uses For Product | Bicycles, Ladders |
| Required Assembly | No |
| Shelf Type | Hanging Shelf |
| Shelf Weight Capacity | 100 Pounds |
| Style Name | 2-pack |
| UPC | 885333131429 885479572728 885425722108 885298275985 885337884369 885678239255 885839771716 885874929752 885274894926 885399539641 885181482650 885889988294 786372972083 885388250380 885909208241 885760804569 613103032023 885463625416 885265926780 885153980788 885196185935 885465508496 |
| Unit Count | 1.0 Count |
J**.
Works great after some modifications
As some other reviews have noted, the install can be a bit tricky. I decided to mount the pulleys to a 2x4 sitting on top the rafters in my garage because I wanted to get the bike as far above the floor as possible. This also made the installation easier because I was able to get the pulleys positioned and screwed to the 2x4 while I was standing on the floor instead of trying to do it while up on a ladder. First I measured the bike to gauge the approximate distance the pulleys should be from one another. Then, I taped the pulleys to the board using strong gorilla tape. Next I suspended the board at about eye level between a ladder and a shelf in my garage, threaded the rope through the pulleys, and attached the hooks to my bike and gave it a try at ground level more or less. (Had the tape not held the pulley brackets in place for the test I would have used some small screws as temporary holders but the tape actually held it fine so I didn't need to do that.) Once I confirmed that the bracket placement was correct, I attached the pulley brackets to the 2x4's using the screws provided. Others have noted the screw quality it not very good. I think that's correct, but by drilling the proper size pilot hole I didn't have any trouble with them. Next, with the brackets attached to the 2x4, before I got up on the ladder and finagled the two before into place above the rafters. Once in the position I wanted, I drilled a 1-in hole through the rafter in between the brackets so that the line could pass through without any friction. See picture of this as well. During the first two initial tests my bike fell. My seat doesn't have a lip on the back of it and the hooks just slid off, allowing the bike to fall. I used a vice and a heavy mallet to bend the metal on the ends of the hooks so they would not be as likely to slip off the handlebars or the seat. I ultimately decided to use the hooks grabbing the seat rotated 180° from what is recommended so that they grab the seat from the front. See the picture I posted. With those modifications it works fine and doesn't seem likely to slip off. Some have noted that it lifts the bike unevenly. That is true. I lift the bike most of the way up, then pull down on the end of the bike that is higher, and then finish raising it the rest of the way. The total install took me about 2 hours, but it was worth it. Space is at a premium in my garage, and I don't have any wall space left to mount a bike, so this product was the perfect solution and I'm glad I bought it. I would highly recommend it just be aware you need to allow time to adapt it to your specific situation.
R**C
Great product and a great price for a 2 Pack. Get it!
Directions were easy to follow. The other reviews here on amazon were helpful. Here are my tips/thoughts for you. 1. Use a 2x4 or a 2x6 to mount the pulleys to. (Get a 10 footer at a hardware store and most places will cut in half for you if you don't have a saw) 2. Throw the bags of screws they give you in the trash. They are terrible and you'll strip them before they are sunk into the wood. Get some deck screws while you are picking up your wood. Also get some lag bolts and washers to mount the 2x4 or 2x6 sections on to the joists. 3. Run the lines through the hooks and the pulleys before you mount it on the ceiling before you mount it. Tie the knot in the end of the front bracket before you mount it to the 2x4 or 2x6. I had to undo mine before I realized this would be easier if done before hand. 4. The nylon line included is super long. With the bike down give yourself a foot or two to use to pull the bike up and cut the rest off. Use a lighter to melt the end of the line where you cut it to prevent it from unraveling itself. 5. The hooks work fine and I did not need to bend mine at all. Just measure the distance between your handlebars and the back of your seat as the instructions indicate and you'll be fine. I can swing my bikes while they are mounted and they are not coming down. 6. The line brake works great but people are right I could see myself replacing the lines after a few years use. 7. The system is easy enough that my mother in law had no problems raising and lowering the bikes.
B**K
Feels like it's missing hardware but does the job for ebikes!
Bought these and left them in box for over a year. I finally got fed up enough with the cluttered garage so I did an overhaul with paint and finally utilize the super high ceilings. Overall they were fairly straight forward to install. Finding the joists with a 2x4 was the hardest part. I did not trust the J hooks that are on the pulleys at all to hold up my ebikes. Luckily I found some cheap climbing carabiners and soft straps and used those instead to attach to the hoist. They also do not give you enough hardware to mount to the 2x4. They say you only need 4 bolts per mount but in my opinion I would add screws to fill all the holes in the 2x4. There is 6 screw locations total per mount and they only provide 10 screws for one hoist kit. There are 2 mounts so it's missing a few screws. I also used 5/16" and 3 inch lag screws from home depot and did 3 lags per bike mount on a 2x4 attached to the ceiling joist. Mounted all the hardware on the 2x4 on the ground after measuring the bars to seat distance. They are not included with the kit. The rope seems to do the job, but I would also suggest picking up a 3/8" rope from home depot while you are there for the lag screws. Overall it's pretty good value for the money but doing it on high ceilings you better get comfortable with a tall ladder. They saved me a ton of space and seem sturdy enough so I'm a happy camper.
P**R
Cheap, sturdy, easy to operate, excellent function
Well priced and it works. The hardest part of the install will probably be to locate and center up both mounts on the ceiling. I used a laser that projected a vertical line on the ceiling and this allowed me to line up both mounts. Every bike will be slightly different so measure the distance between where you want the front and rear hooks to pick up the bike. This will allow you to get a rough idea of how far apart the mounts should be. My garage ceiling is finished with drywall so my solution was to drill some holes where I wanted the mounts and the I climbed up into the attic above the garage to add some 2x4’s between the joists. The mounts are solidly in place. Finally, DO NOT CUT THE ROPE, until you have everything installed and then lower the bike to the floor. Once on the floor, determine how much rope you need in order to reach it easily. Then cut the rope to whatever maximum length you need. Otherwise, it’s a great product and has freed up a good amount of space in my garage.
B**E
Excellent product. Using this product above all other products available on the market. Saves a lot of space. Excellent price from Amazon. Thanks Amazon.
M**Z
La instalación es sencilla si sabes y te gusta hacer este tipo de cosas, si no, se te puede complicar, yo lo adapte a una estructura de protección de un patio sin problemas, en mi caso tengo 2 bicis de adulto 1 jr. Y una infantil
G**X
Installation assez simple mais par contre il faut aider la montée du vélo . La corde est très longue , je vais sans doute installé un treuil manuel pour plus de facilité.
M**.
Been using this for last year or so.. Holds my bike well, simple to put up and easy to use
L**T
Tiptop
ترست بايلوت
منذ يوم واحد
منذ أسبوع